
Paying with crypto for the first time may look a little unfamiliar, but don’t worry. We’ll take it one screen at a time.
There are only four things you really need to remember:
- Choose the exact coin
- Choose the exact network
- Use the temporary address shown for your order
- Send the full amount without rounding
This guide uses OKX as an example. Other wallets and exchanges may look different, but the information you need to enter is the same.
How to Pay with Crypto on 9Crave: A Step-by-Step Guide
This guide uses OKX as an example. Don’t have a crypto app yet? You can register through our link and follow the same steps below.
Already use another wallet or exchange? That works too.
9Crave may earn a referral reward if you register through this link. It does not increase your order cost. Availability may vary by region.
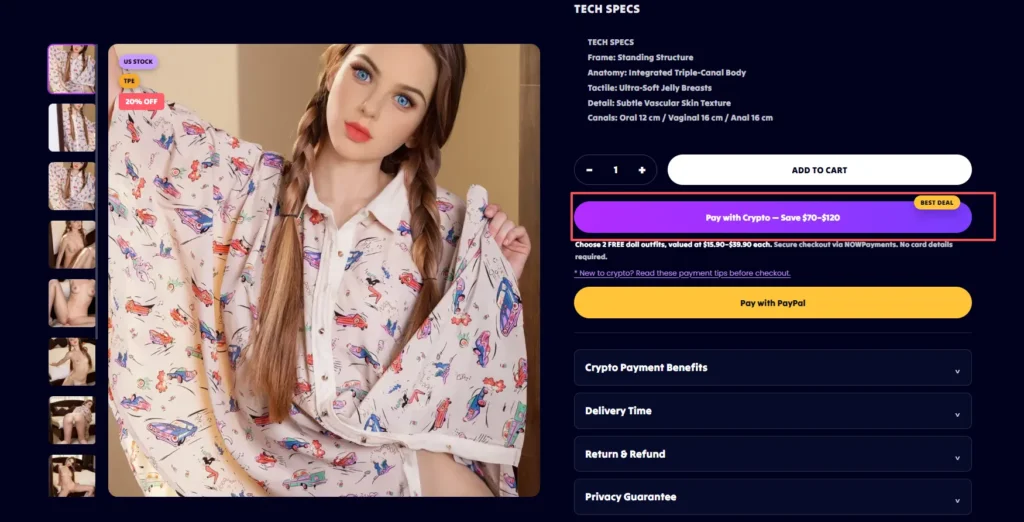
Step 1: Choose Pay with Crypto
On the product page, click the purple Pay with Crypto button.
Eligible doll orders can receive a crypto discount and two free doll outfits after the payment is confirmed.
Step 2: Select NOWPayments at Checkout
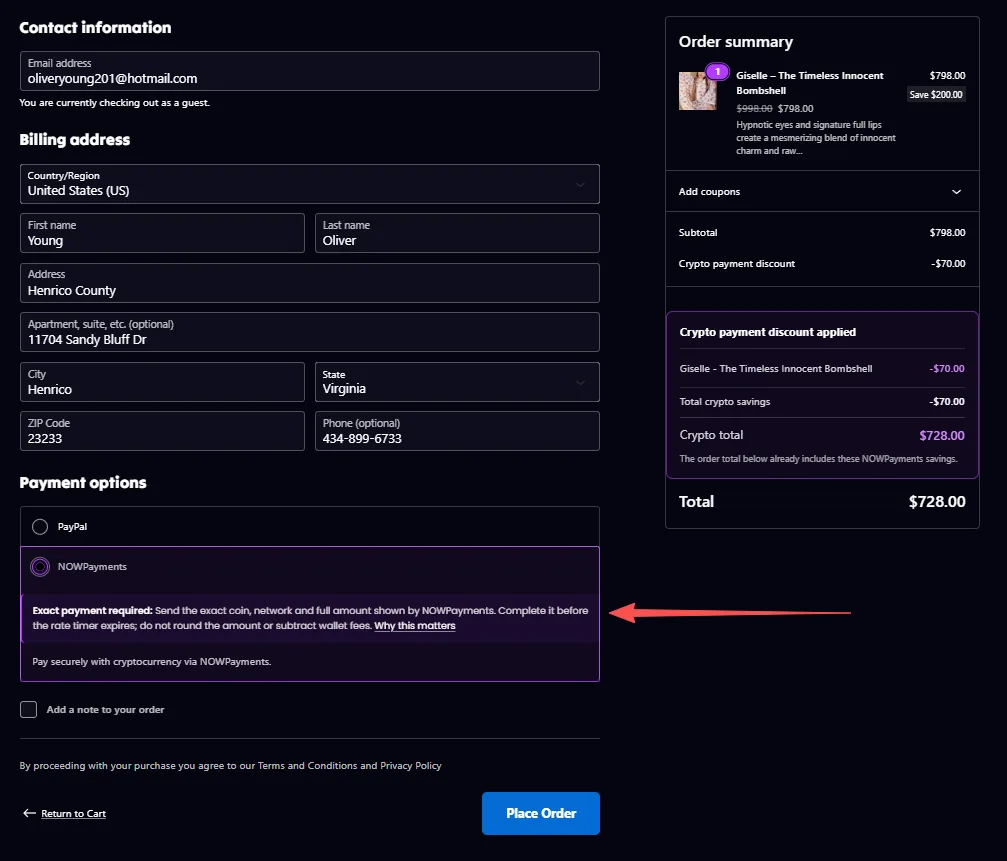
Complete your contact and delivery information, then select NOWPayments under Payment options.
The order summary will show your crypto savings before you place the order.
For eligible products, the discount is based on the individual product price:
- $300–$800: save $70
- $801–$1,499: save $90
- $1,500 or more: save $120
For example, the product shown in the screenshot qualifies for a $70 discount, so the crypto total is $70 lower than the regular checkout total.
The amount shown in your checkout summary is the amount that applies to your order.
Step 3: Keep the 9Crave Status Page Open
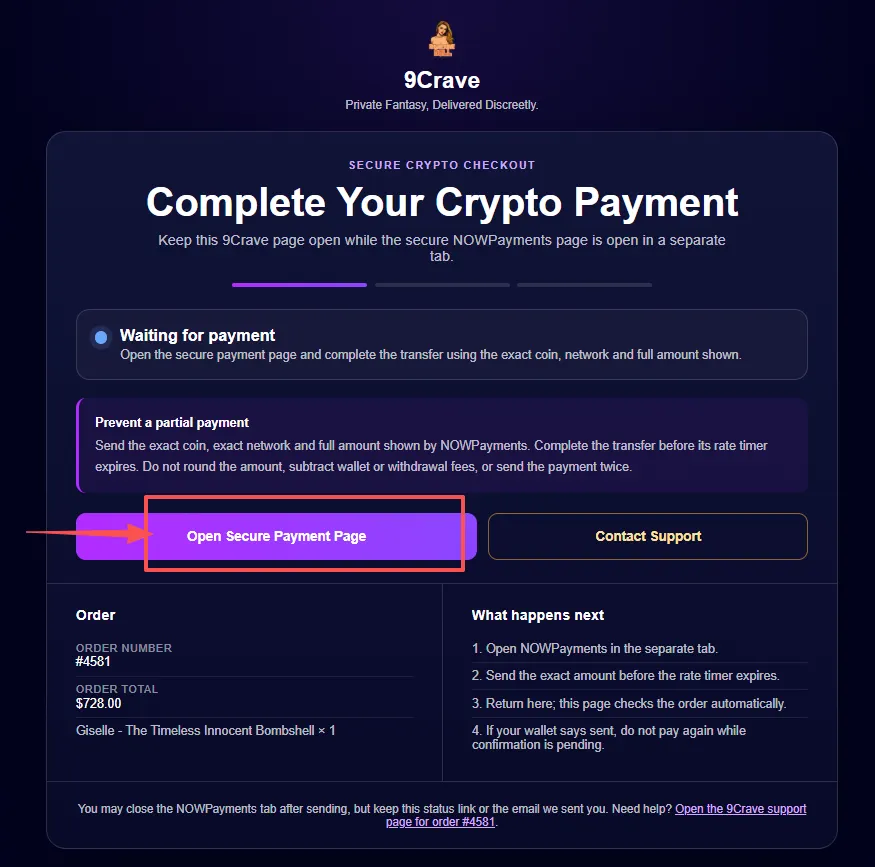
After placing the order, you will arrive at the 9Crave crypto payment-status page.
Take a moment to read the payment tips, then click:
Open Secure Payment Page
The secure NOWPayments page will open in a separate browser tab.
Keep the 9Crave status page open. It checks your order automatically and will let you know when the payment has been confirmed.
NOWPayments is a third-party cryptocurrency payment gateway created by ChangeNOW.
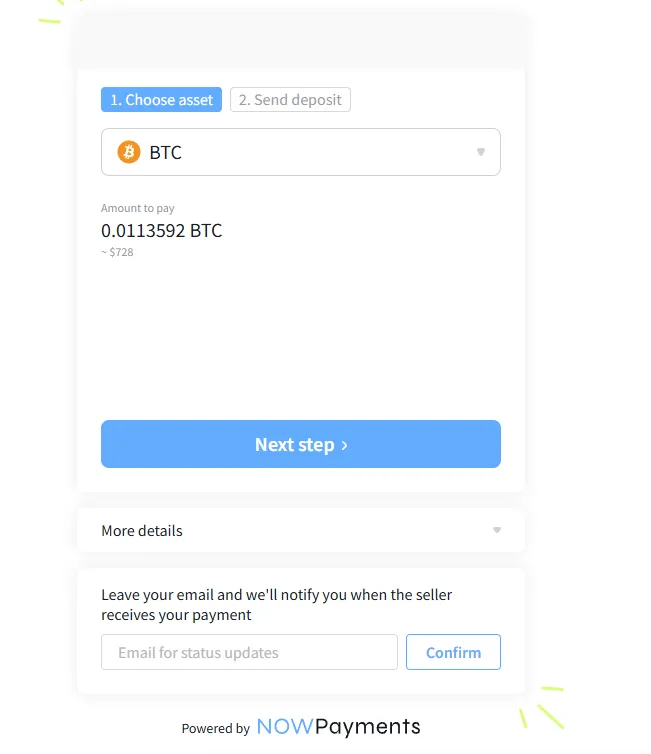
Step 4: Choose Your Cryptocurrency
The NOWPayments page may show BTC by default.
Click the currency box to open the list of available cryptocurrencies.
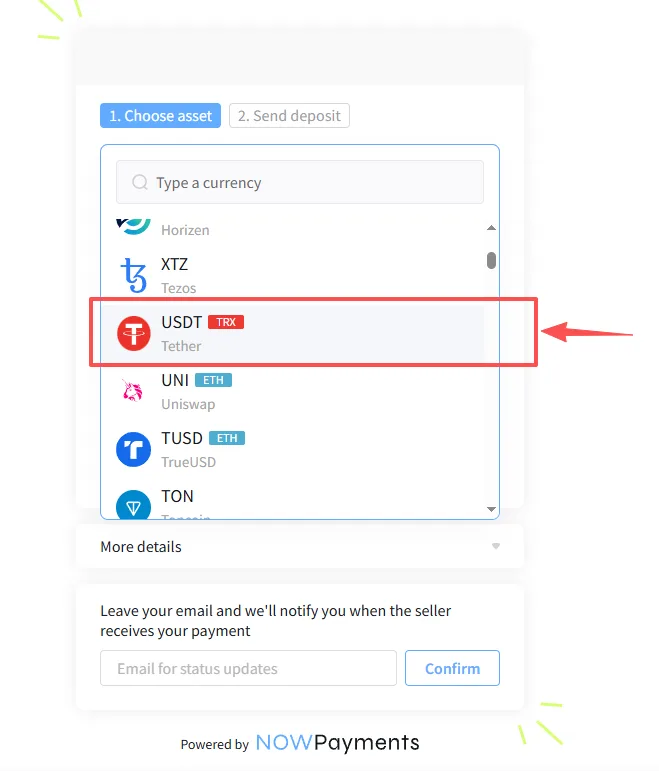
Experienced crypto users can choose a supported coin and network they already understand. For first-time users, we recommend USDT on TRON when it is available.
Step 5: Select USDT with the TRX Label
Look for USDT with the red TRX label.
On NOWPayments, this means USDT on the TRON network. In OKX and many other exchanges, the same network is shown as:
Tron (TRC20)
They refer to the same USDT network. Do not accidentally select the separate TRX coin unless you actually intend to pay with TRX.
In our own test, USDT TRC20 confirmed much faster and was easier to follow than BTC. However, processing times, minimum amounts, and network fees can change.
If you already hold another cryptocurrency and know how to use it, you may still select that coin.
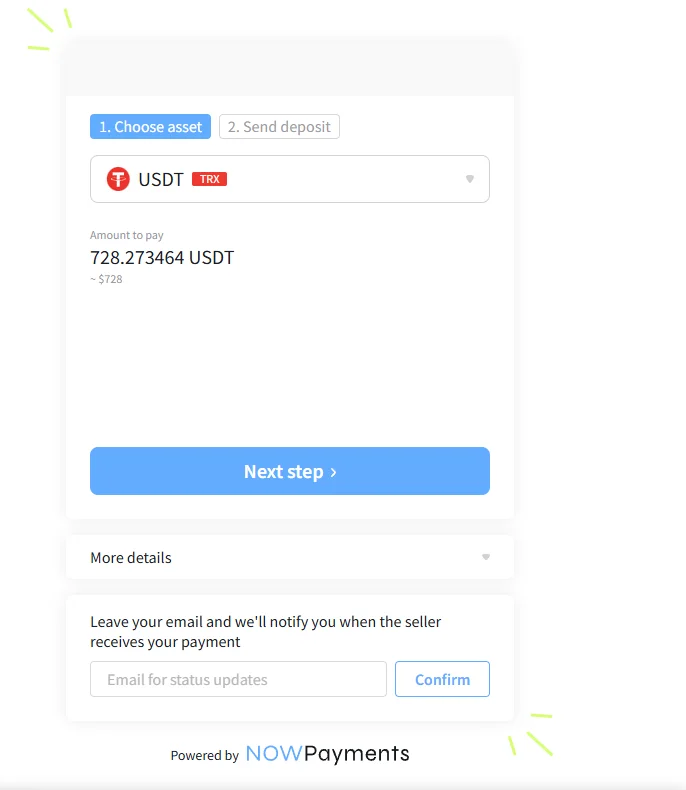
Click Next step after making your selection.
The crypto amount shown on this screen may change with the exchange rate. Always use the latest amount currently displayed and complete the transfer before the payment timer expires.
Step 6: Check the Address, Amount and Network
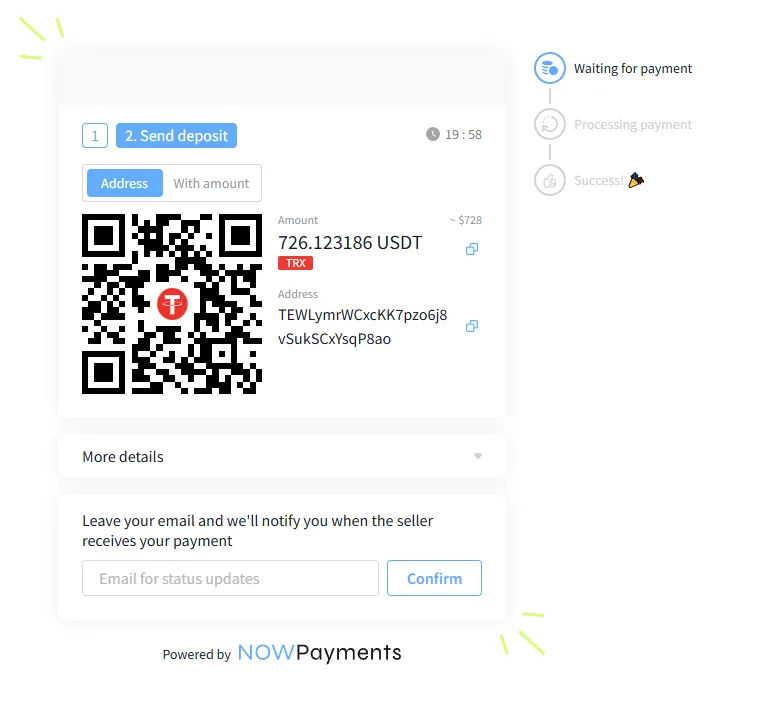
NOWPayments will now generate:
- A temporary payment address
- The full cryptocurrency amount
- The required network
- A payment timer
This address is created for your payment. Do not copy an address from this guide, an old order, or another customer’s screenshot.
You can scan the QR code or copy the address manually.
Some wallet apps can read both the address and amount from the QR code. Other apps may only recognize the address, so you may need to enter the amount yourself.
That is normal. Just check everything carefully before sending.
Step 7: Open OKX and Select Tron (TRC20)
The following steps use OKX as an example.
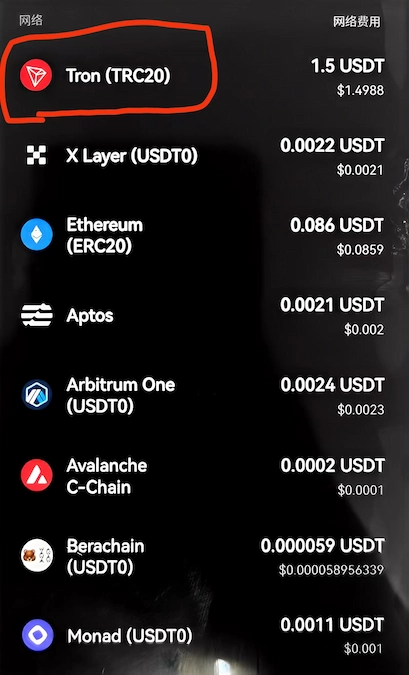
Open your USDT balance and choose Withdraw or an on-chain transfer.
Don’t let the word “Withdraw” worry you. In an exchange app, it simply means sending crypto to an external blockchain address.
When OKX asks you to select the network, choose:
Tron (TRC20)
This must match the USDT–TRX network selected on NOWPayments.
Fees shown by your exchange can change, so always check the current fee before confirming.
Step 8: Paste the Temporary Address
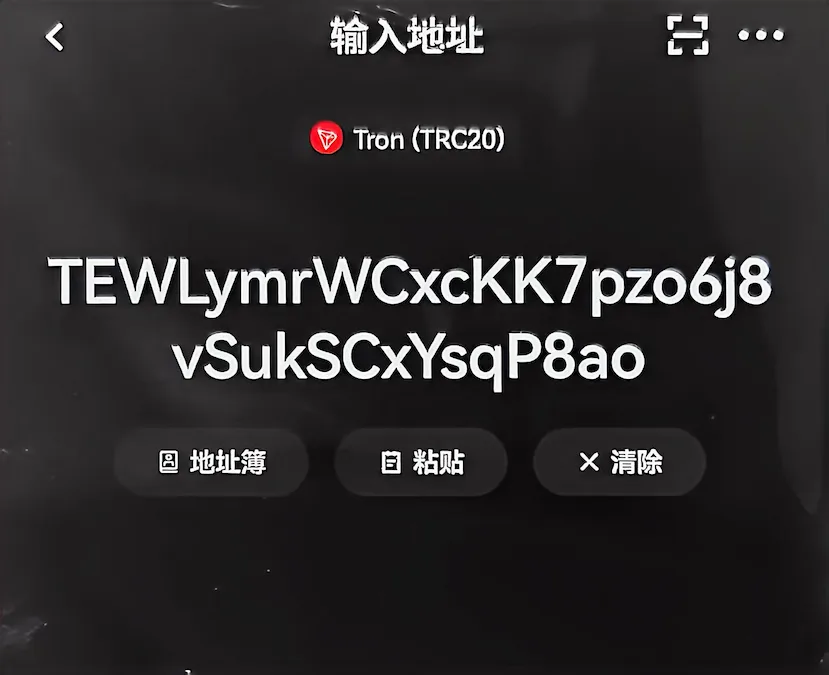
Paste the address generated by NOWPayments.
Carefully compare the beginning and end of the address before continuing.
The address in this screenshot is only an example. Every payment can have a different temporary address, so never reuse it for another order.
Step 9: Enter the Full Amount Exactly
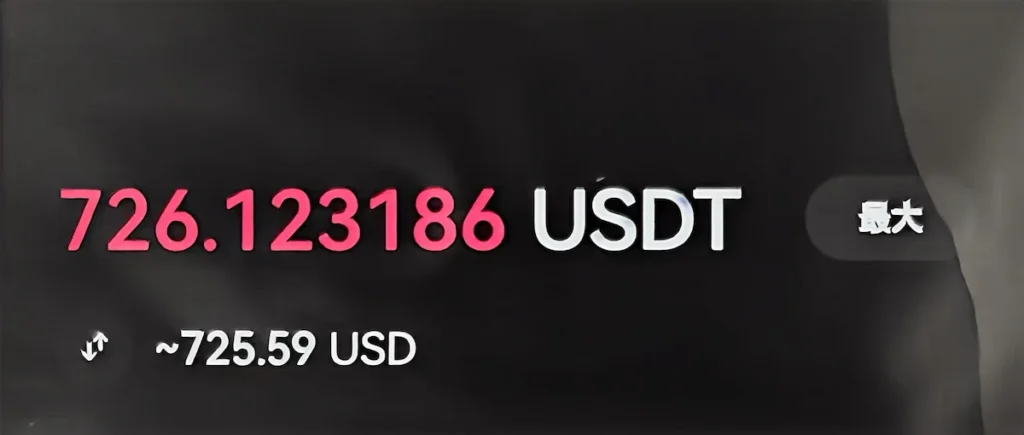
Copy the full amount shown beside the NOWPayments QR code.
For example, if NOWPayments shows:
726.123186 USDTyou must enter:
726.123186 USDTDo not round it to 726.12 or 726 USDT.
Also check the amount received or recipient receives field in your wallet. The amount reaching NOWPayments should match the requested amount.
If your exchange deducts its withdrawal fee from the receiving amount, make sure the recipient will still receive the full amount requested.
Even a small shortage may cause the payment to be marked as partially paid.
Step 10: Confirm the Transfer and Wait
Complete the security verification required by your wallet or exchange, then submit the transfer.
After sending, please be patient.
In our USDT TRC20 test, the payment was detected in around two minutes, but actual confirmation times can vary.
If your wallet says Sent or Completed, do not pay again. NOWPayments may still need a little time to detect and confirm the blockchain transaction.
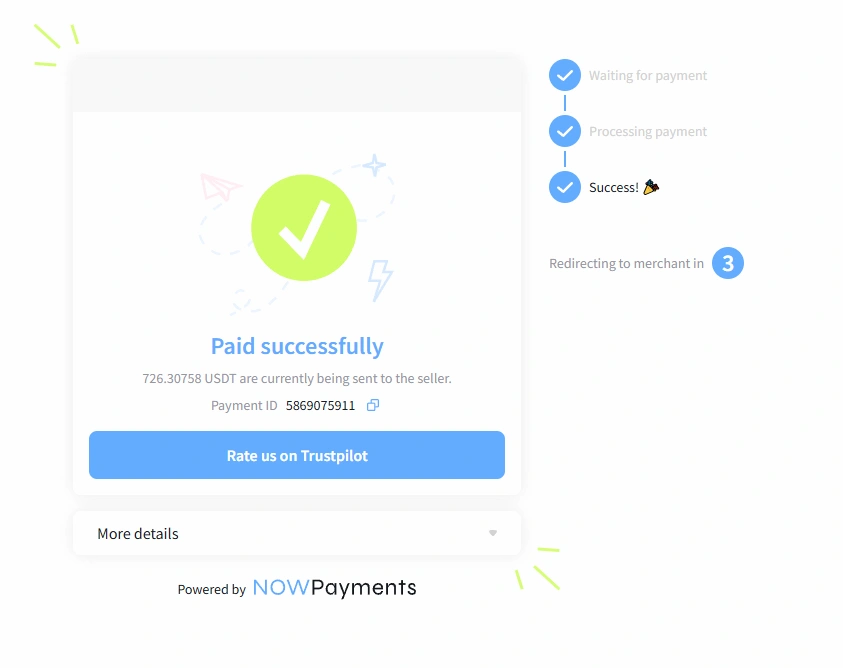
Once the payment is confirmed, the NOWPayments page will show Paid successfully and begin returning you to 9Crave.
Step 11: Wait for the 9Crave Confirmation
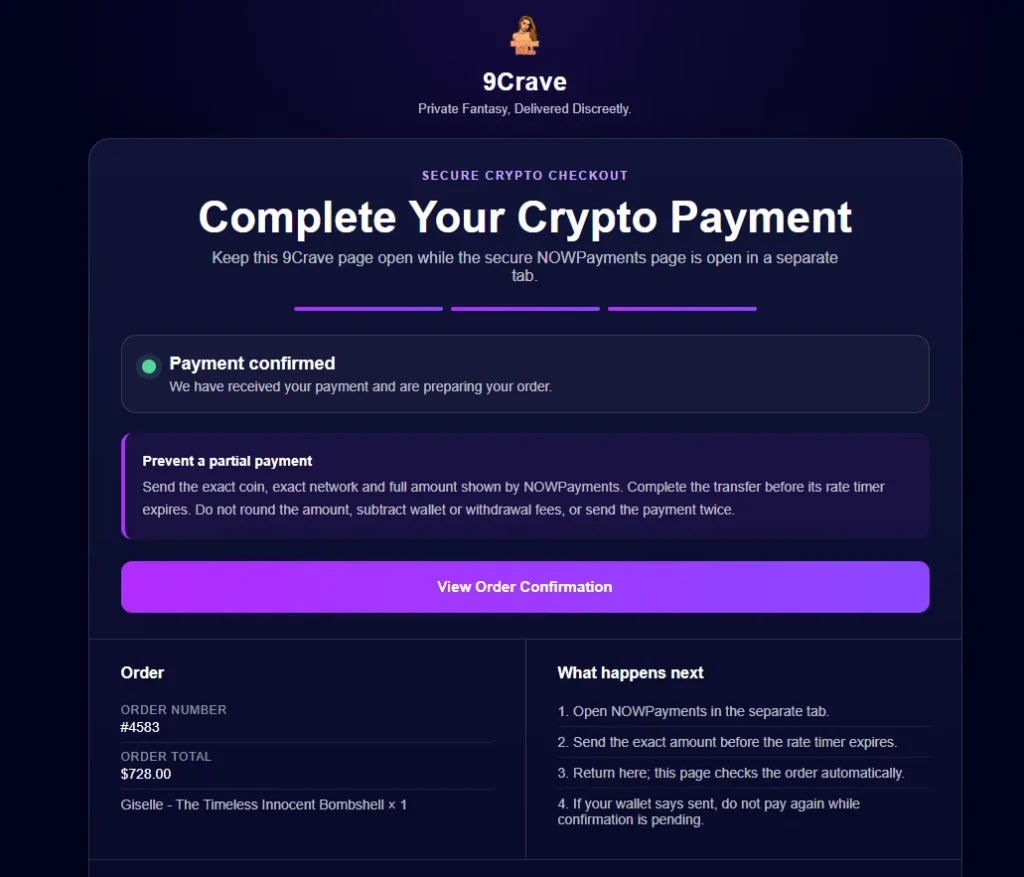
Return to the 9Crave payment-status tab.
The page will update automatically from Waiting for payment to:
Payment confirmed
It will then open your order confirmation.
There is no need to refresh repeatedly or send another payment.
Step 12: Choose Your Two Free Outfits
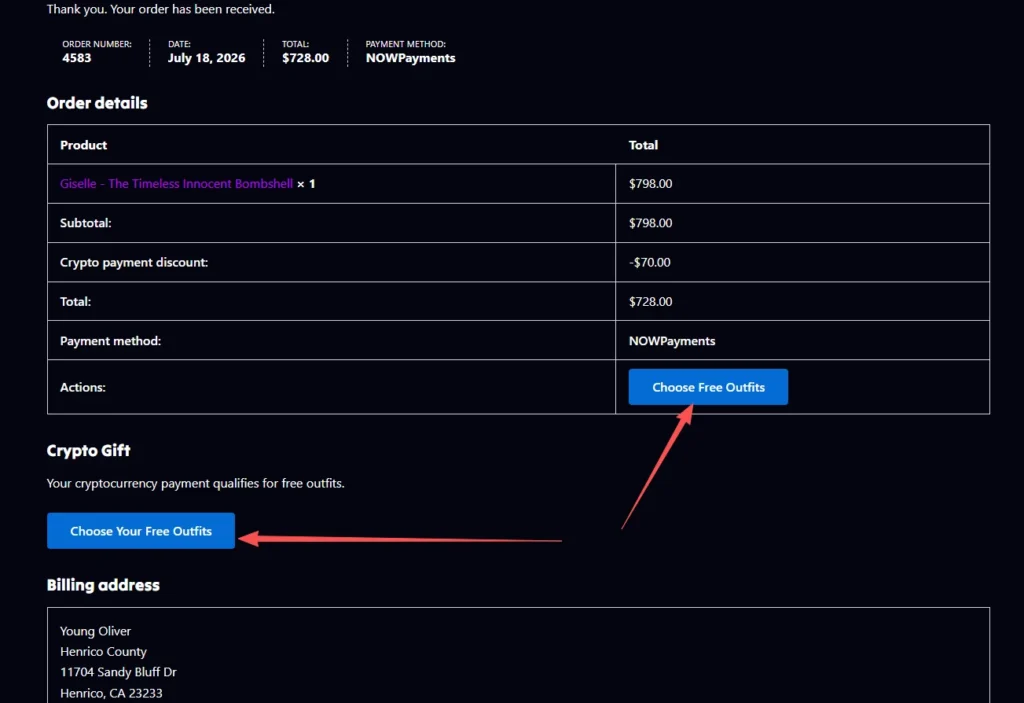
After a confirmed crypto payment for an eligible doll order, your order page will show a button to choose your two free outfits.
Either gift-selection button will take you to the same page.
Orders containing only Doll Outfits do not qualify for this gift.
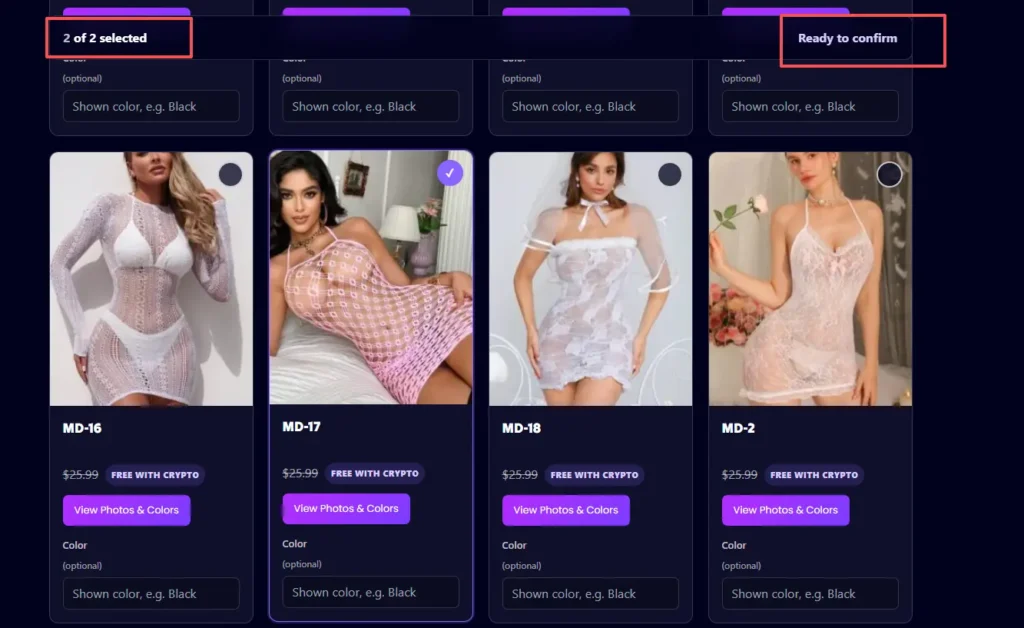
Browse the available gift collection and select any two outfits.
The available outfits are normally valued between $15.90 and $39.90 each. The displayed price does not matter—you may choose any two available items from the gift-selection page.
Click View Photos & Colors to check a product in more detail. After viewing it, return to the gift page and continue your selection.
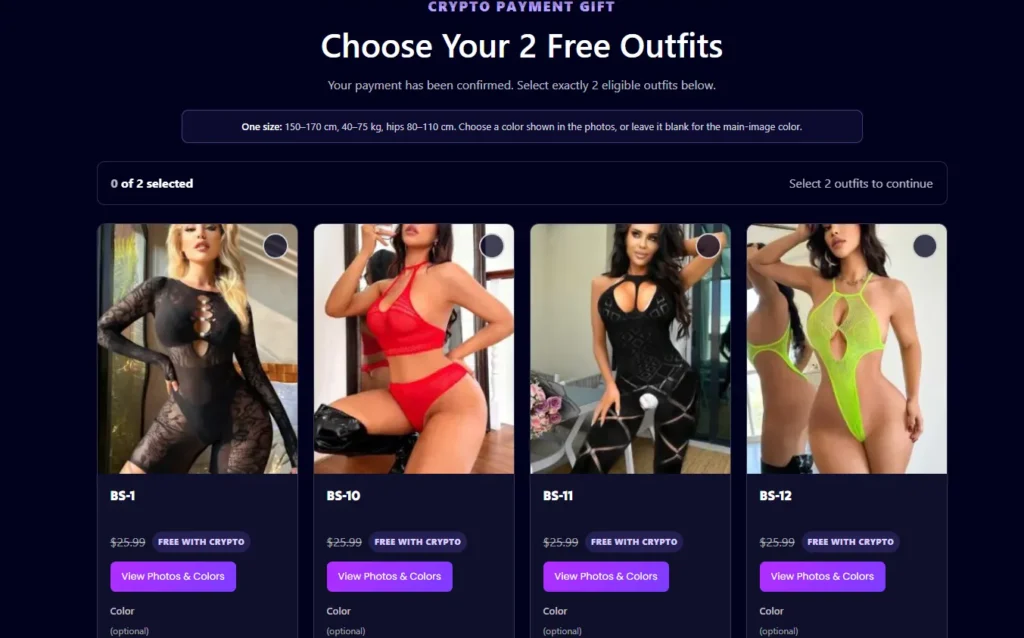
Once two items have been selected, the page will show 2 of 2 selected and Ready to confirm.
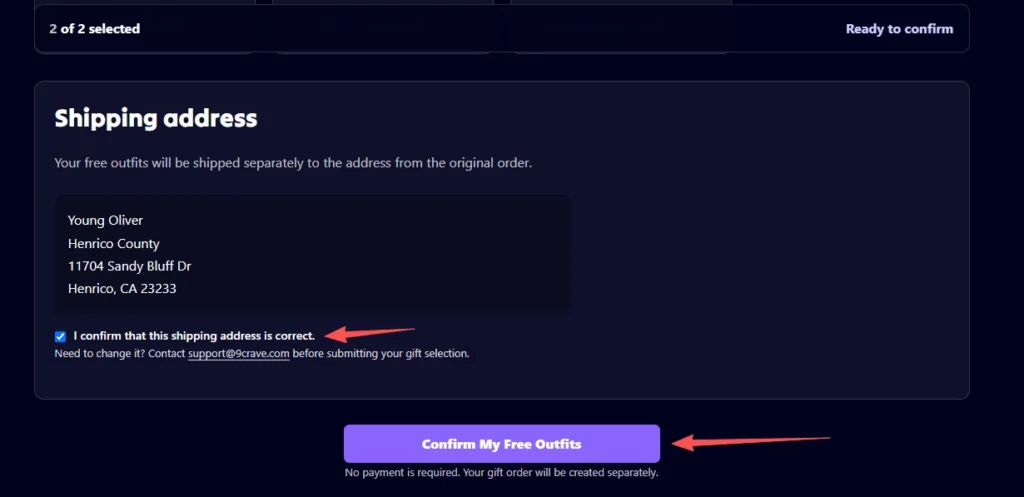
Scroll down, check your delivery address, tick the confirmation box, and click:
Confirm My Free Outfits
No additional payment is required.
Step 13: Gift Selection Complete
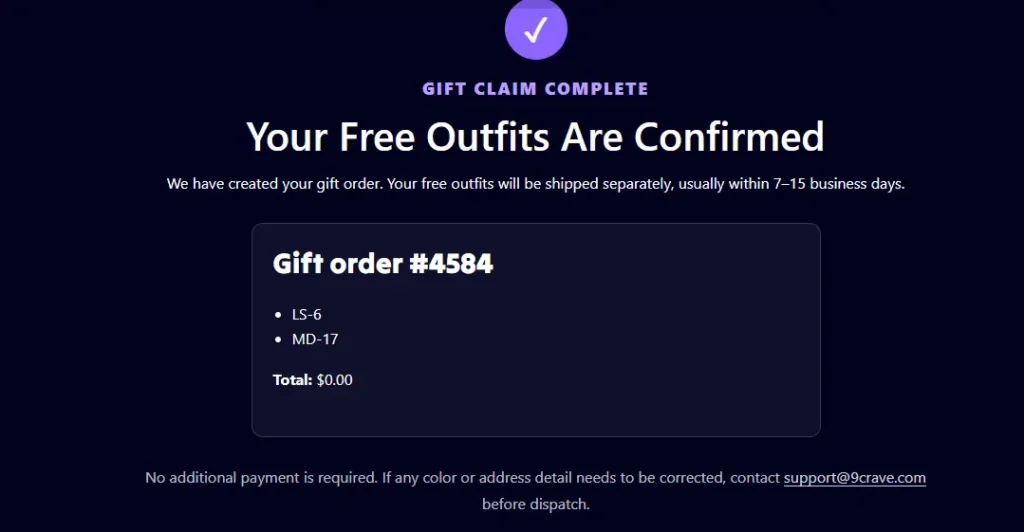
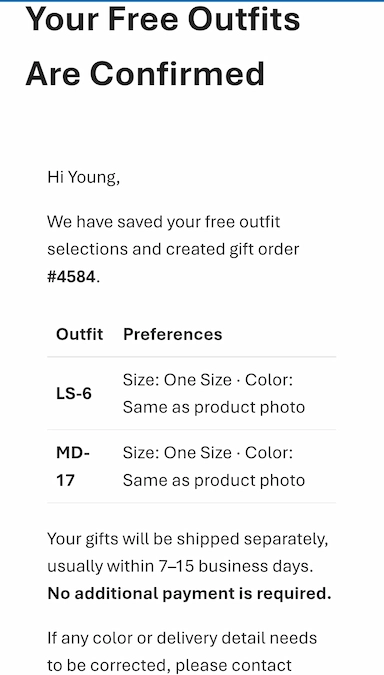
After submitting your choices, you will see the gift confirmation page.
Your two selected outfits will be created as a separate $0 gift order and shipped separately.
You will also receive email updates:
- An email confirming your paid 9Crave order
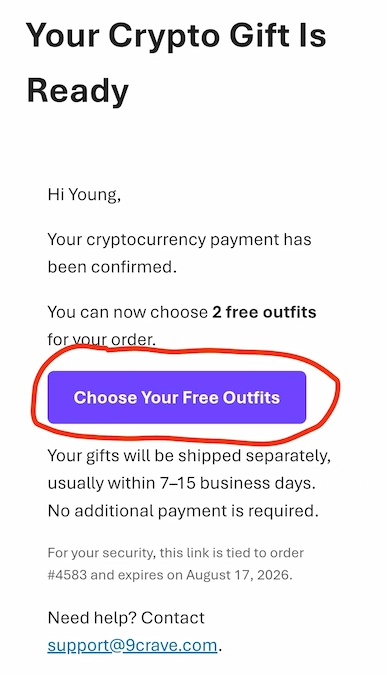
- A separate email inviting you to choose your two free outfits
- After you submit your choices, a gift-selection confirmation email
If you close the website after paying, don’t worry. Use the purple button in the gift email to return to the secure selection page.
Check your Spam or Junk folder if you cannot find the email.
What If Something Goes Wrong?
If your payment shows partially paid, stays pending for a long time, or you are unsure what to do:
- Do not send the entire payment again
- Keep your 9Crave order number
- Keep your NOWPayments Payment ID
- Use the Contact Support button on the 9Crave payment-status page
You can also contact us by email or WhatsApp.
Please tell us which coin and network you used and include the transaction hash if available. We’ll help you check the payment.
One Last Check Before Sending
Before pressing the final confirmation button, check these four things one more time:
Coin · Network · Address · Full amount
When all four match the NOWPayments page, you’re ready to send.